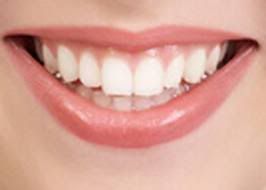
Everyone wants to have that million dollar smile. The key to achieving this is of course, those bright white teeth. Drinking coffee, carbonated drinks, smoking, berry and other food and drinks are some of the causes of stained teeth. The truth is that even those that take really good care of your dental hygiene will have to deal with yellowing of their teeth.
I have to admit that I did not put much thought into whitening my teeth until I went to a club that happen to have a fashion show that same night. I was talking to one of the models and could not get over how white her teeth were. I just thought it made her look younger, and more put together. Her hair was a mess and the make up was a grudge theme, but when she smiled it just worked. At that moment I knew that I was going to find a way to get my teeth whitened. She did later admit that she gets whitening done at her dentist regularly (especially because she smokes)
I did some research into bleaching my teeth, but found that this method could damage your teeth and is very costly. Prehaps if the results were permanent I would have put more consideration into this process, but you would have to have this done more than once to maintain. Also, I want to keep my own teeth until at least I am 103. lol
Well I decided to google teeth whitening and here is what i found that had real results.
1. Crest 3D White Whitestrips Advanced Vivid - I had read many good review on this product and found a coupon, so I thought why not give it a chance. I really liked how simple it seemed and that it is enamel-safe. The information below is what is found on the official website.
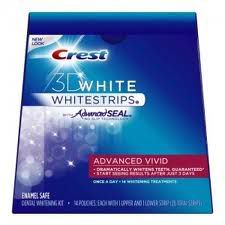 Crest 3D White Whitestrips Advanced Vivid
 uses revolutionary Advanced Seal technology. This groundbreaking adhesive formulation holds the Whitestrips in place, so you can whistle along with the radio, take a shower, and even drink water while you whiten!
Formulated with the same enamel-safe whitening ingredient dentists use, this teeth whitening system removes surface stains and those below the tooth’s surface. Use them for 14 days, and get whiter teeth that last.
Apply Crest 3D White Whitestrips Advanced Vivid once a day for 30 minutes. You'll start seeing whiter teeth after 3 days, and full results in 14.
I had tried other whitestrips but these were the first and only ones I really liked. With the Advanced Seal I was able to talk, drink water and do what I needed to do without worrying about the strips moving out of place. I really wanted to test these strips so I kept drinking water and was singing (not well but I tried) to the songs on the radio. I noticed a significant change on the 4th day. At the end of the 14th day I did notice quite a change and I was very happy with the result. Your teeth will not have the same result as bleaching but believe me it makes a huge different. You do have to try to stay away from foods and drinks that stain your teeth to maintain the results.
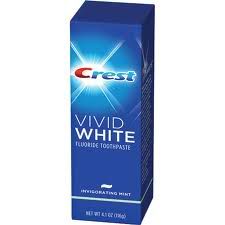
I used the Vivid White Toothpaste to help maintain and continue to whiten my teeth. With the toothpaste the process is not as fast but you will see a significant different after a month. Also, When I used the Vivid White to maintain the result I got from the Whitestrips it did maintain the results longer as opposed to non-whitening toothpaste.
How often you use the strips is completely up to you, but I suggest using the strips for 14 days about 2 times a year. If you do not consume many products that stain teeth this can be done once a year.
If you need a whiter smile in an instance than I would go for Crest 2-hour express. The crest website states th following about this product.
With
Crest 3D White 2-Hour Express Whitestrips you'll get a noticeably whiter smile in just 2 hours. Apply once for 2 hours and get noticeable results that last for three months. Each kit contains 4 treatments so you can keep your smile bright for a whole year.
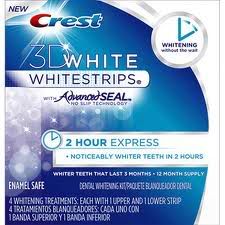
New Crest 3D White 2-Hour Express Whitestrips is formulated with the same enamel-safe ingredient dentists use. And since it uses our groundbreaking Advanced Seal technology, you’ll get convenient, no-slip whitening. You can even drink water while you whiten!
I have not personally tried one, but I have heard good things from close friends. These are more costly, but if you have a short notice event it will do the trick.

If you like home remedies, than baking soda is the way to go. Many people have been doing this for years and still not everyone knows this trick. Simply put tooth paste on your tooth brush, enough to cover all of the bristles. Put Baking soda on top of the tooth paste, enough to cover all the tooth paste and brush like usual. Another option would be to replace your toothpaste with baking soda. That option would show significant results in less time, but not many people can handle the taste. I myself use toothpaste and baking soda and it has worked well. Baking Soda is safe to use and if extremely affordable. Baking soda can be found at the 99 cent store (for a small box) and you can purchase a large box for less than 4 dollars. Plus it will last you a very long time.
FOR DATE NIGHT: Apply a lipstick with blue undertones. The blue will make your teeth look whiter. Most often used is a red color, but make sure it has blue.

IF YOU HAVE ANY TEETH WHITENING TRICK PLEASE SHARE AND COMMENT.
Hope this is helpful ....


 T
T


